Understanding Account Setup Settings
The Account Setup Settings control essential configuration options within the PortPro system. These settings help define how your company's information appears on system-generated documents.
Key features include:
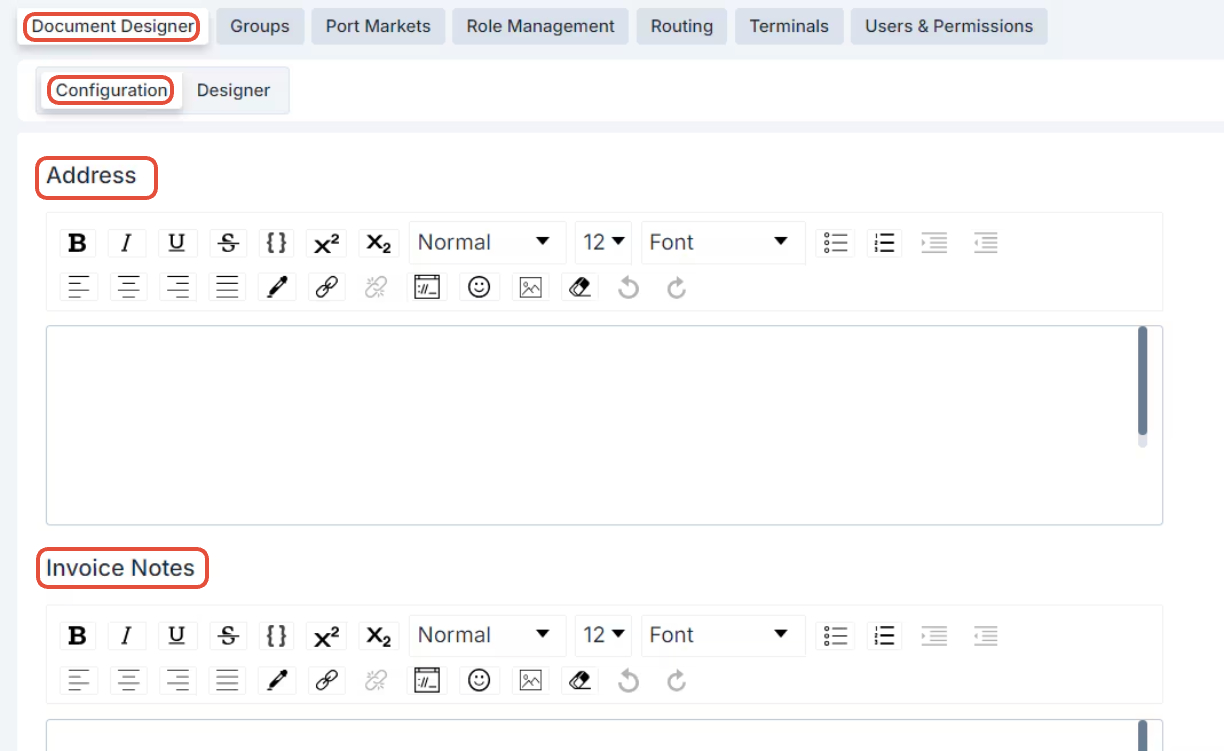
Document Designer - Configuration
Customize system-generated documents with free text fields for:Company address
Invoice notes
Other relevant information
These details will automatically appear where applicable across invoices and other documents.
Configuring Document Settings
On the Configuration page, you can tailor how documents appear by enabling or disabling specific data fields. These settings can be adjusted per document and per terminal (if you operate in multiple port or rail locations).
Key options include:
Field Toggles
Turn data fields on or off for individual documents and terminals.Editable Text Fields
Click into boxes (e.g., company address) to enter custom text.Dropdown Menus
Use dropdowns for selectable fields like dates to match your preferences.Save Your Configuration
Once your setup is complete, click "Save as New Configuration" in the top right to preserve your changes.

Using Groups for Efficient Setup
Groups help streamline the setup of tariffs, quotes, and automated emails by combining nearby locations into a single unit. This reduces repetitive data entry and simplifies configuration.
Benefits of using Groups:
Group Nearby Locations
Combine ports, rail terminals, cities, or zip codes that are geographically close.
Example: NY/NJ ports can be grouped together for efficiency.Simplify Tariff Setup
Add a Group as a pickup or delivery location instead of entering multiple individual customer profiles.Save Time on Quotes & Emails
Use Groups to apply the same logic or communication to several locations at once.

Port Markets (Super Admin Only)
The Port Markets section—available only to Super Admins—displays a list of ports and rail terminals across the U.S. and Canada.
Key features:
Select Locations
Choose ports or rails to automatically generate customer/organization profiles for all associated terminals.Enable Container Tracking
After profiles are created, add login details under Container Tracking Credentials to start receiving tracking data.
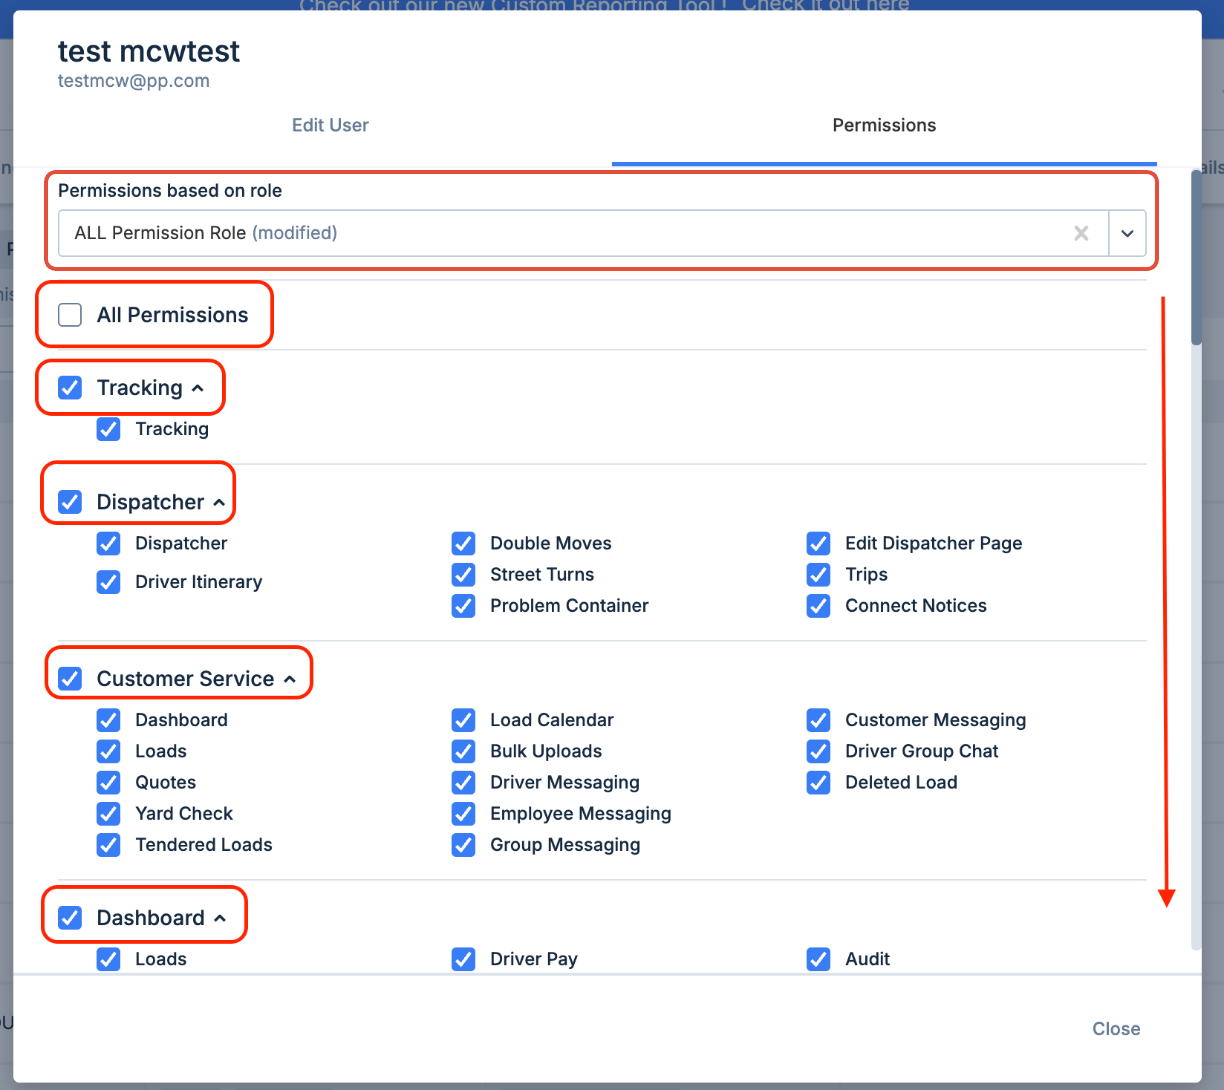
Role Management
Role Management lets you define custom user roles with specific permissions, streamlining user setup.
How it works:
Create a New Role
Enter a name for the role.Assign Permissions
Select the permissions you want associated with the role.Apply to New Users
Assign roles as default permissions when creating new user accounts.

Terminals (Super Admin Only)
The Terminals section—available only to Super Admins—allows your organization to separate operations by port or rail location for more granular control.
Key features:
Location-Based Division
Terminals divide your operations by region (e.g., different ports or rail areas).To enable Terminal functionality, contact our Support Team.
Flexible Assignments
Terminals can be applied to:Loads
Customer profiles
Internal users
Custom Load Prefix
Customize the load number prefix for each terminal to improve load tracking and identification.Enable SCAC Codes
Activating SCAC (Standard Carrier Alpha Code) is crucial if:It needs to appear on documents
You use automated appointment scheduling
Using Terminals enhances organization, clarity, and automation across multi-location operations.

Users & Permissions
The Users & Permissions section allows administrators to manage access to various system features for internal users. You can add new users or modify existing ones to control what terminals they can access and what actions they can perform.
Add new users via the Add User option.
Click the pencil icon next to a user's name to edit their terminal visibility and permissions.
System Roles are built-in and include Admin, CSR (Customer Service Representative), and Sales Agent.
Admins can:
Add and manage users.
Assign CSRs and Sales Agents to customer profiles.
Custom Roles are created through Role Management and allow for tailored permission sets based on specific needs.


Was this article helpful?
That’s Great!
Thank you for your feedback
Sorry! We couldn't be helpful
Thank you for your feedback
Feedback sent
We appreciate your effort and will try to fix the article